Among other options for saving, Photoshop also offers to save a file as a PDF. Any file in a PDF format can be used for a wide range of use cases, such as press, presentations, user manuals, or ebooks. In this post, I’ll show you how to save a Photoshop file as a PDF and what the ideal export configuration should look like.
Although there are multiple ways to do it, the quickest way to save a Photoshop file as PDF is by going to File > Save As and then selecting the Photoshop PDF file format from the Save as type menu. After choosing the export location and clicking Save, the configuration panel will show up. You can change various settings such as compatibility, output, compression settings, etc. To complete the export, click on the Save PDF button, and Photoshop will save the PDF file to the chosen location.
I will now show you how to do it step-by-step using both methods.
Method 1: Save Photoshop File as PDF
This method is similar to the usual routine of saving the artwork in any format offered by Photoshop. It includes opening the file, making changes, and saving it via the Save As menu. You will most likely need to use this method to share your artwork with preserved layer data that can be opened in other tools.
Step 1. To save a Photoshop file as PDF, first open the file you want to convert to PDF. You can simply drag and drop it into the Photoshop workspace or go to File > Open and then choose it from your PC.
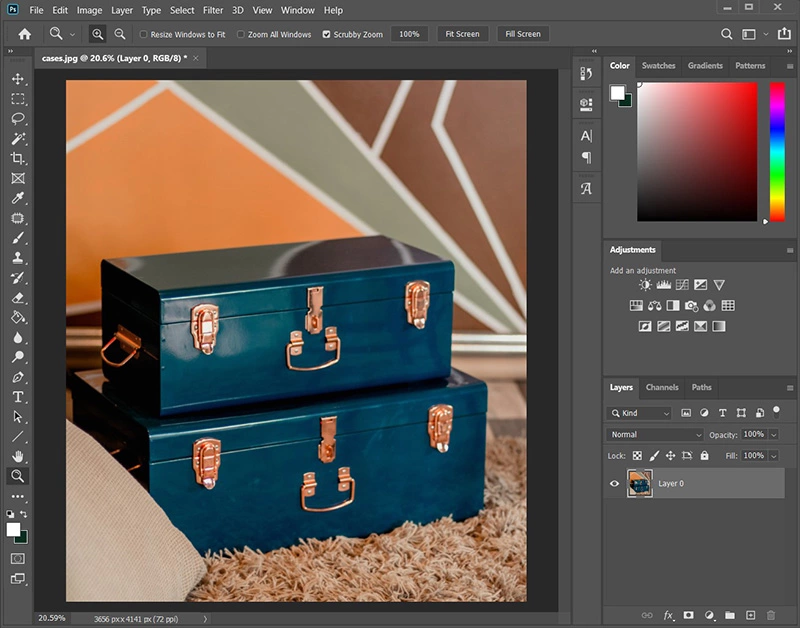
Step 2. After you have applied changes to the image, go to File > Save As or press Shift+Ctrl+S (Windows) / Shift+Command+S (Mac) to open the Save menu.

Step 3. Make sure to select Photoshop PDF from the Save as type menu and click Save.
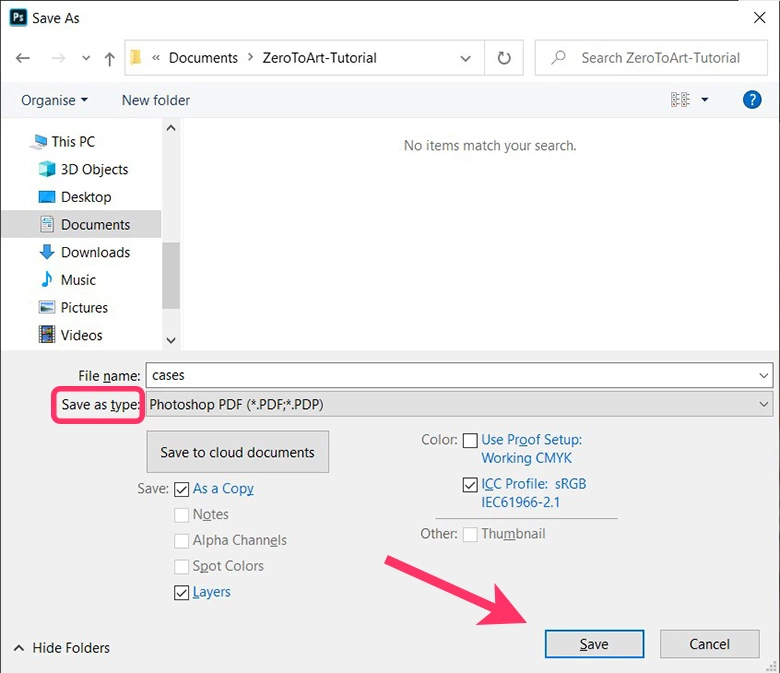
Step 4. Another panel containing the PDF configuration will show up. It includes options related to compatibility, security, and quality. In the following section, I explained what can be configured. After modifying settings, click on Save PDF to export the PDF file to the desired location.

PDF Export settings
At the top of the panel, there are three options you can change: Adobe PDF Preset, Standard and Compatibility.

- Adobe PDF Preset – It offers a few predefined presets for specific use-cases such as High-Quality Print, Press Quality, Smallest File Size, PDF/X-4:2008, etc. Selecting any of these options will change the overall configuration accordingly. You can also save your own preset after modifying options. Then, each time you open the panel again, your preset will be shown among the Adobe PDF Preset input options.
- Standard – PDF standard your document should be compatible with. By default is set to None, and it’s sufficient in most cases.
- Compatibility – Option that defines what Acrobat versions should your document be compatible with.
Also, there are five different configuration categories shown on the left side of the panel. I will now go through them and explain the most important settings.
General tab contains options related to preserving editing capabilities, shortcut for web preview and auto-generated thumbnails representing PDF pages.

- Description – If you want to have a description embedded into your PDF export file.
- Preserve Photoshop Editing Capabilities – If this option is checked, it will allow you to make further edits upon opening the file in Photoshop again since the layer data is saved also.
- Embed Page Thumbnails – Creates a thumbnail image of the artwork.
- Optimize for Fast Web Preview – As the name says, this option checked will optimize the file for fast loading on a website.
NOTE - Remember that leaving the Preserve Photoshop Editing Capabilities option checked will significantly increase exported file size because it will preserve all the layer data.
Compression tab contains options related to image quality and downsampling. Ideally, you will need to use these options if you want to decrease the size of the exported file. A quick overview of options is presented down in the list, but if you want to know more, read the official Adobe guide.

- Downsampling configuration consists of the following options: Do Not Downsample, Average Downsampling To, Subsampling To, Bicubic Downsampling To.
- Compression – Determines the type of compression that is used.
- Image Quality – Consists of the following options: Minimum, Low, Medium, High, Maximum. Each option determines the relative quality of images.
Output tab contains options related to color conversion and PDF/X standard compliance. If you plan to print your work and the result should follow particular standards, then you’ll have to dive into different standards and differences between them. However, most common standards are already covered by predefined presets at the top of the configuration panel.

Security tab contains options related to authorization and permissions to do certain actions with the PDF. For example, by checking the Require a password to open the document, you’ll restrict all unauthorized viewers from opening the file.

Summary tab does not contain any particular settings; it just summarizes all the chosen options from the previous tabs.
Method 2: Use PDF Presentation to save multiple pages as PDF
Another method to save a Photoshop file as PDF is by using the PDF Presentation feature. This feature allows you to merge multiple files into a single PDF file. It comes in handy when creating a presentation, brochure, or ebook containing multiple pages. Before using this feature, make sure that you have prepared all files that should be converted into PDF.
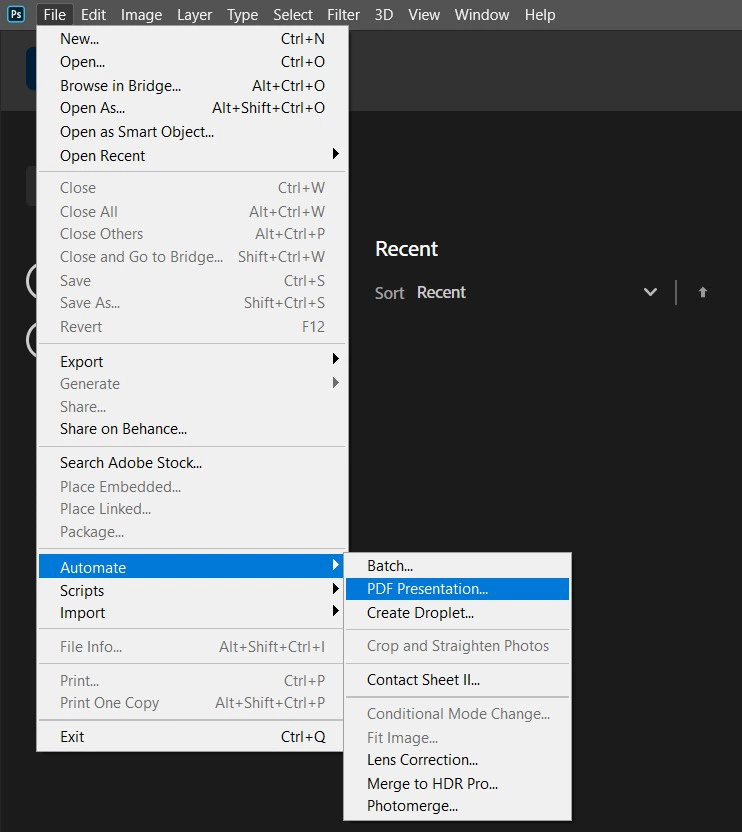
Step 1. Prepare all files that should be part of a PDF. The easiest way is to put them into the same directory on the PC. Then choose File > Automate > PDF Presentation to start the process of combining these files into a single PDF file.
Step 2. A new panel will show up, asking you to add source files that should be combined into a PDF presentation. Click on Browse and select files you have prepared beforehand.

Step 3. You can change the page order by dragging each page to a different position. There are two available output options: multi-page document and presentation. The main difference between these two is that the presentation has additional options for automatic looping and transitions between slides. Other mutual options include background color, font size, and visibility of basic metadata. After deciding what settings you want to modify, click on Save to apply changes.

Step 4. Choose a location where the PDF will be saved and hit Save.

Step 5. The last step is to configure PDF options, as explained in the previous section. After setting up options as you want, click on Save PDF, and a PDF containing selected files will be generated on the PC.
If you open it in another PDF viewer tool, such as Adobe Acrobat Reader, you can see it contains multiple pages generated from the source files. That was super easy and fast!
Extras: Adobe PDF Presets explained
Let’s go back to the PDF configuration panel and learn the main differences between those predefined PDF presets. Each preset can be used for some of the most common situations when it comes to exporting PDF files. Use this cheat sheet when you are unsure what preset is best for your use case.
Photoshop offers these presets:
- PDF/X-1a:2001 – This preset is compliant with the PDF/X‑1a standard that is used for exchanges in which all files should be delivered in CMYK and/or spot colors, with no color-managed data.
- PDF/X-3 – This preset is used for sharing when all files are based on device-independent data.
- PDF/X-4 – This preset supports transparencies, so PDF-X/4 contains all data required for output without flattening. As previous two presets, this one is also mainly used to satisfy necessary standards for print jobs.
- Press Quality – This preset is used for high-quality print production. When the print quality is your biggest concern, use this one because it will preserve important data for most production press.
- High-Quality Print – This preset is used for printing on desktop printers and proofing devices. Use this one when you are printing materials for everyday use instead of distribution.
- Smallest File Size – As the name implies, this one is used when the file size is important to you since it compresses images more aggressively. Choose this preset when you need to show the PDF on the web or via email.
Conclusion
We went through two different methods of how to save Photoshop file as PDF. Although Photoshop is primarily a photo editing tool, it also does an excellent job handling different export formats like PDF. Knowing what can be configured while exporting PDF from Photoshop can make a big difference in how the exported file will look like. There are options for low quality and small file size output and options for high-quality print production. In the end, it’s only important what will be the purpose of the exported PDF file.