You could be very confused at first if you wanted to crop a layer in Photoshop. The main reason lies in the fact that Photoshop’s workflow is based on layers. That means if you try to crop a layer using the most obvious tool for that purpose – Cropping Tool – you’ll end up cropping the whole image instead of only one layer.
In this article, I’ll explain a few different methods of how you can crop a layer in Photoshop. You’ll then decide which method works best for your case.
How to Crop a Layer in Photoshop
You may end up asking, what’s the quickest method to crop a layer in Photoshop?
In short, to crop a layer in Photoshop use the Rectangular Marquee Tool. First, select the layer you want to crop. Then drag the selection box around the specific part of a layer you want to crop down to and copy (CTRL+C for Windows or Command+C for Mac) it to the clipboard. Paste (CTRL+V for Windows or Command+V for Mac) the cropped area of the layer into a new layer. In the end, delete the layer from which the selection was cut out.
Now let’s go through the following few methods in more detail.
Method 1 – Crop Layer using the Marquee Tool
Let me explain the above method more in detail. Follow these 6 short steps to crop a layer in photoshop using the Marquee Tool:
Step 1. To select the Marquee Tool, press M or choose the Marquee Tool from the sidebar. You have two options:
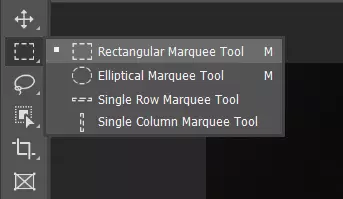
- Rectangular Marquee Tool – makes a selection in the shape of a rectangle.
- Elliptical Marquee Tool – makes a selection in the shape of an ellipse.
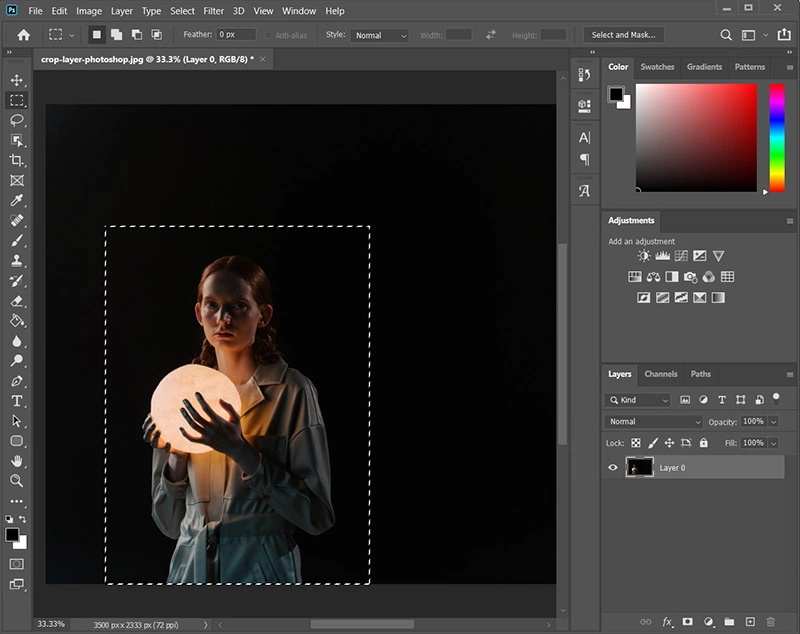
Step 2. Whichever Marquee Tool you choose, draw the selection by dragging the mouse over the part of the layer you want to crop.
Step 3. The selection box should appear in a form of “marching ants”. If you are not satisfied with the selection, you can discard it by pressing CTRL+D, and the selection box will disappear.
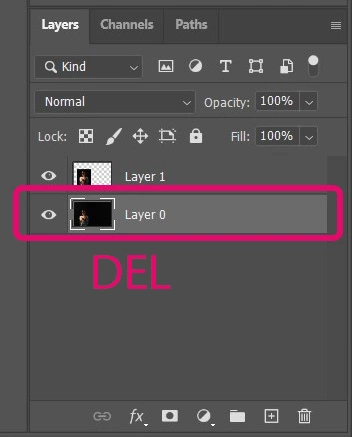
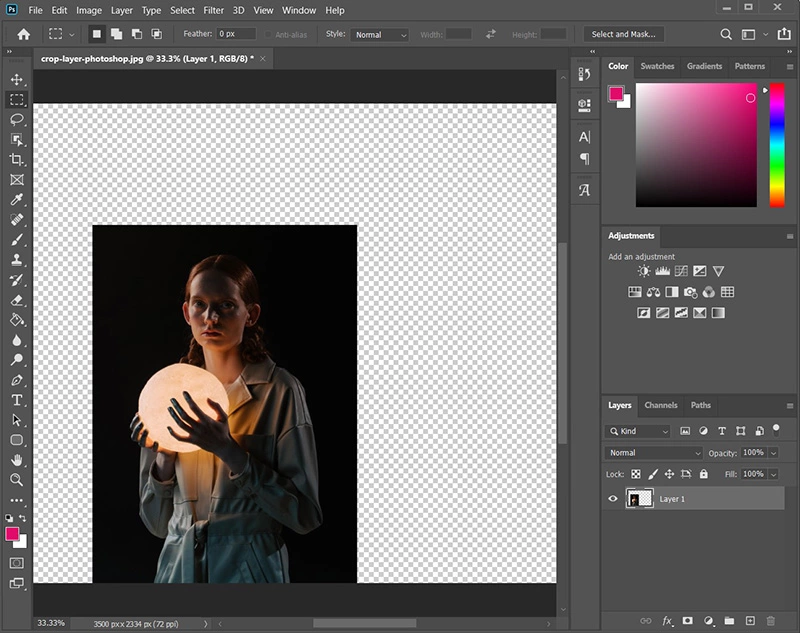
Step 4. After you selected part of the layer you want to crop, there are 2 methods you can use from this point on, first one is to copy the selection to a new layer:
- Go to Layer > New > Layer via Copy or press CTRL+J to copy the selection result into a new Layer.

- Delete the layer from which you copied the selection. You can drag the layer in the trash can (Layers panel), Right-click > Delete layer, or select the layer and then press the Del key.
Step 5. Another method you can use after step 2 is to invert the selection and delete everything extra:
- Go to Select > Inverse or press SHIFT+CTRL+I to invert the selection.
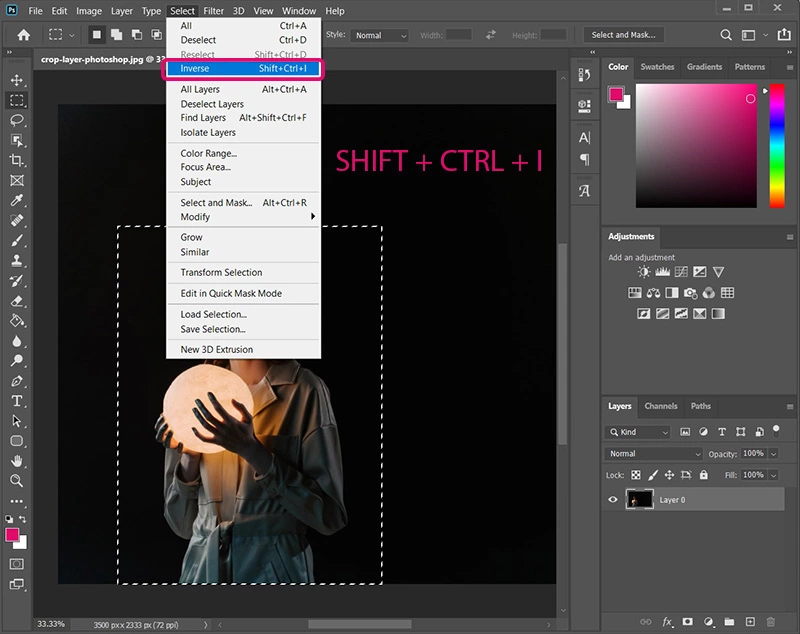
- Choose Edit > Clear or press Del to remove all extra content.
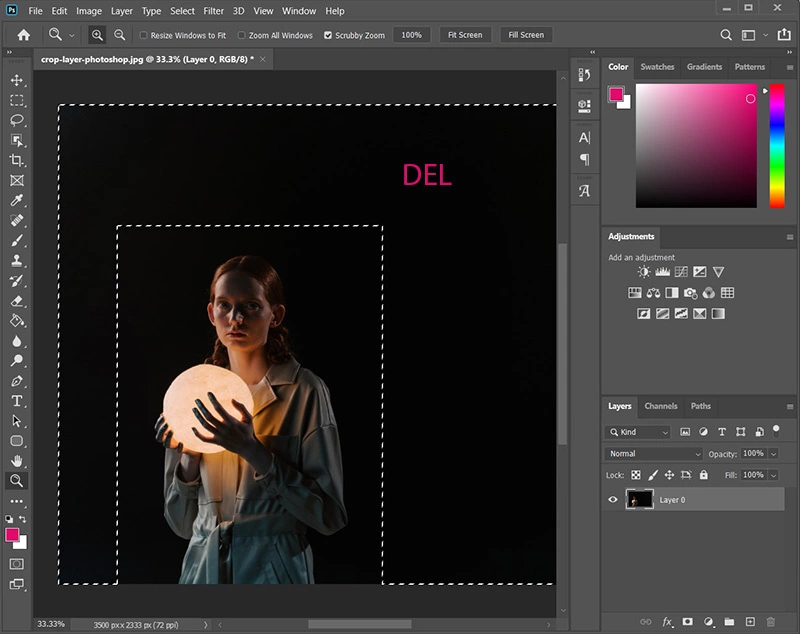
Step 6. Whichever method you choose, at this point you should have a cropped part of the original layer as a result.
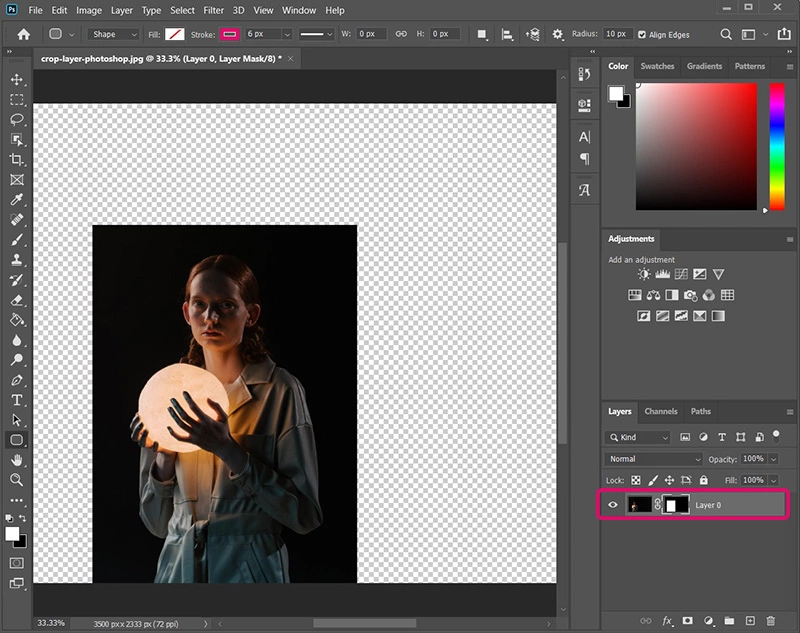
Method 2 – Crop Layer using the Layer Mask
Not so basic but a more powerful method to crop a layer is to use a Layer Mask feature. A layer mask is a grayscale overlay that lets you fine-tune the visibility of a layer on top of another layer or stack of layers.
HINT - You will know when the Layer Mask feature is enabled by looking at the layer thumbnails in the Layers panel. If there’s a black and white thumbnail next to the original layer’s thumbnail then the layer has its layer mask enabled.
Areas of the layer mask that are black will hide original layer content. On the contrary, white areas will let the original layer content be visible. Now you may see how it could help us with the cropping. Let’s go through the exact steps:
Step 1. Choose the Rectangular or Ellipse Marquee Tool and select the desired area of the layer you want to crop.
Step 2. After you are satisfied with the selection, go to Layer > Layer Mask > Reveal Selection or click on the Add Layer Mask icon in the Layers panel.
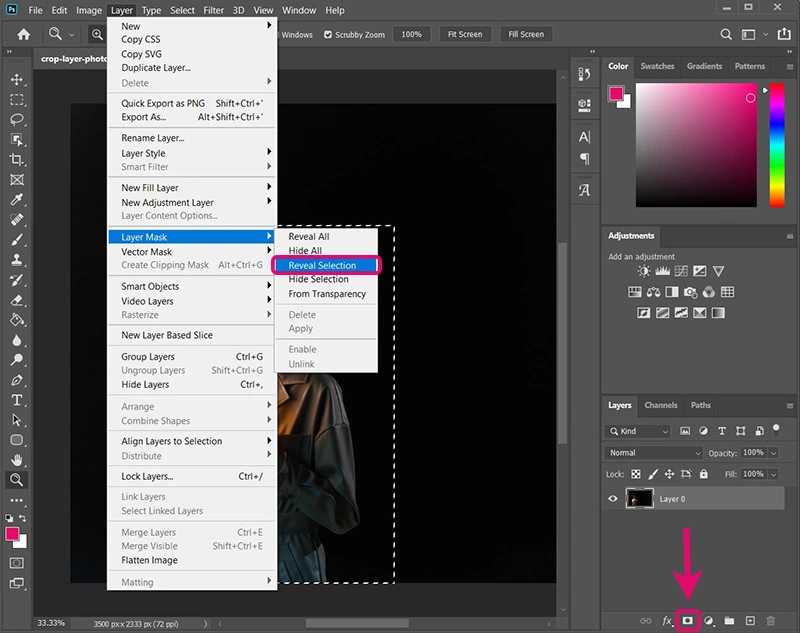
Step 3. Layer mask preview will show next to the original layer preview icon. This means you created a layer mask.
Step 4. Now you can use the full potential of the layer mask. You can fine-tune the selection by choosing black, white, or any value between those and draw shapes on the layer. Depending on the value, the cropped area will expand or shrink.
Method 3 – Crop Layer using the Smart Object
Another advanced method of cropping a layer in Photoshop is by using a Smart Object feature. This method allows you to make non-destructive edits to a chosen layer. And that means that you can modify your cropped area whenever you want.
So, how to crop a layer by using a Smart Object feature?
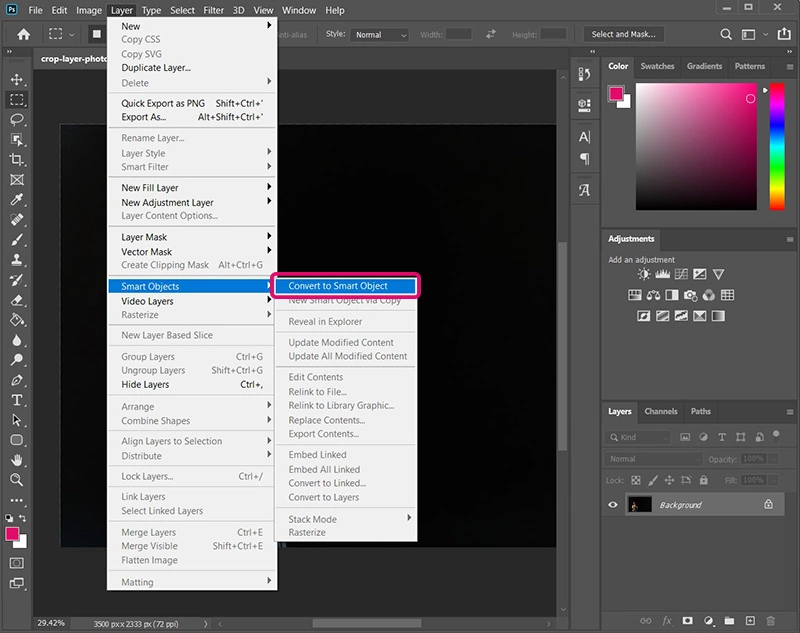
Step 1. Make sure you selected the layer you want to crop. Then right-click anywhere on the layer and choose Convert to Smart Object. The alternative is to select Layer > Smart Objects > Convert to Smart Object.
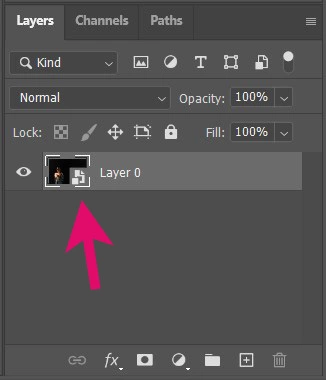
Step 2. After a small icon appears at the lower right corner of the layer thumbnail, double-click the thumbnail to open a Smart Object view for this layer in a new tab.
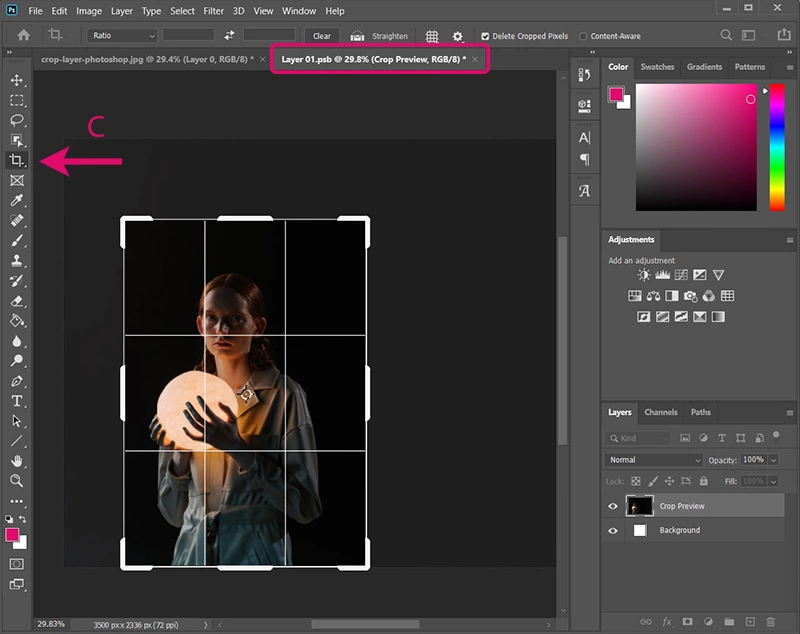
Step 3. Now you can use the Cropping Tool to crop a layer. Press C or choose it from the sidebar menu. Drag the edges to the area you want to crop and hit Enter when you are done.
Step 4. To see the results on the original canvas, save the changes and close the newly opened tab. Only the cropped area will appear on the original canvas.
How to Crop an Image in Photoshop
We covered how to crop a single layer in Photoshop, but what if you wanted to crop the entire image or canvas instead? That’s much easier, don’t worry. You can use the Cropping Tool and quickly achieve the desired result.
WARNING - If you have multiple layers stacked onto each other, Cropping Tool will trim all of them.
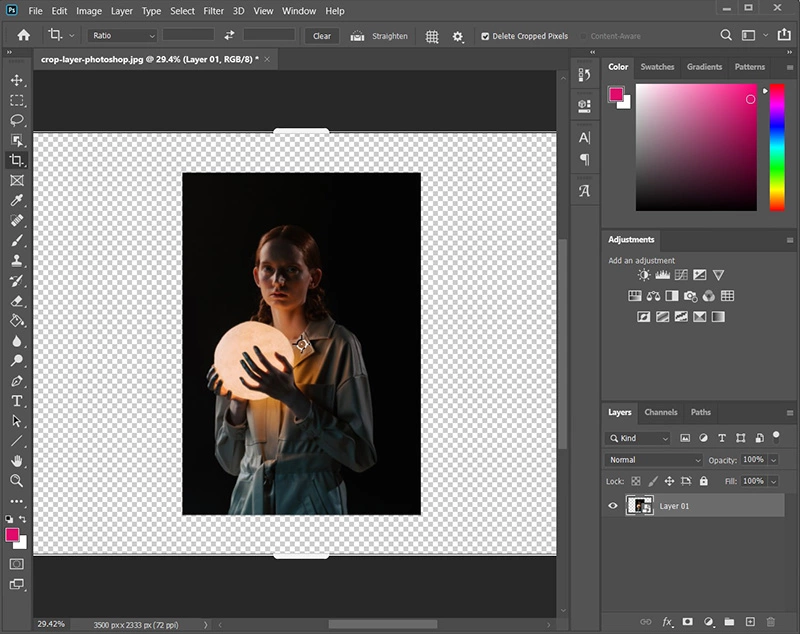
Cropping Tool
- Press C to select the Cropping Tool. You can also choose it from the sidebar menu.
- The area that will remain after cropping will be highlighted, while the area that will be trimmed will be greyed out. Drag edges of the selection to the part of the layer you want to crop and hit Enter.
- Notice that the entire canvas shrunk in dimensions when you applied the crop. This is the main difference between cropping a layer and cropping an image.
Summary
These 3 explained methods should be enough to help you successfully crop a layer in almost any situation. Every method has its pros and cons.
I prefer the cropping via Smart Object. Converting a layer to a Smart Object gives some extra flexibility and it’s non-destructive if you ever change your mind about the cropping result.
Cropping via Marquee Tool is the most basic and easiest method to understand, while the method that uses a Layer Mask can also give you extra flexibility when rethinking if you are satisfied with the cropped area.
I hope I helped you, see you again!