One of the most common examples of working with selections is creating a new layer from a selection in Photoshop. This powerful, yet simple technique enables you to create all kinds of digital art. By copying the contents of one layer directly to another, you can combine images into beautiful composites where only your imagination is the limit.
In combination with, for example, inverting selections in Photoshop you can quickly open yourself a lot of possibilities. Now, let me help you master this skill!
How to create a layer from selection
The fastest method to create a layer from selection in Photoshop is by using shortcuts. First, you have to make sure that the selection on the current layer is active. Then press Ctrl+J (Windows) or Command+J (Mac) to duplicate contents of the selection into the new layer. The result of this action will be a new layer that contains content from the copied selection.
In the following sections, I’ll show you this method and alternative ones through examples.
Duplicate selection to a new layer
As I already briefly mentioned, the most convenient method is to duplicate selection into a new layer.
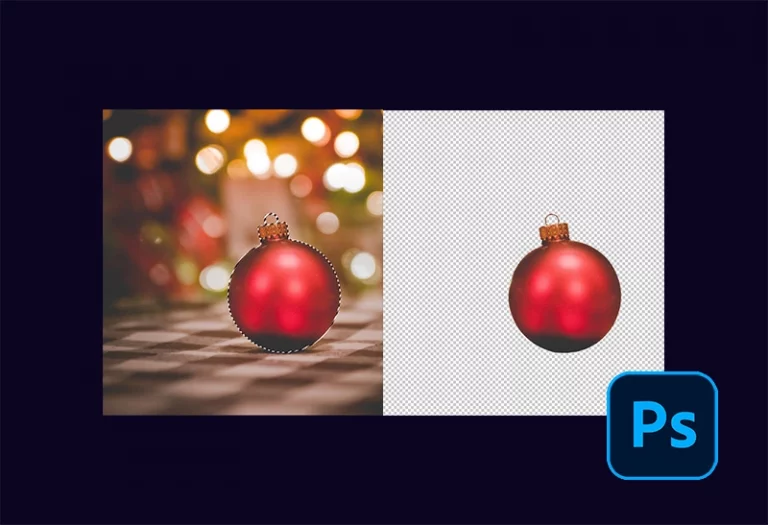
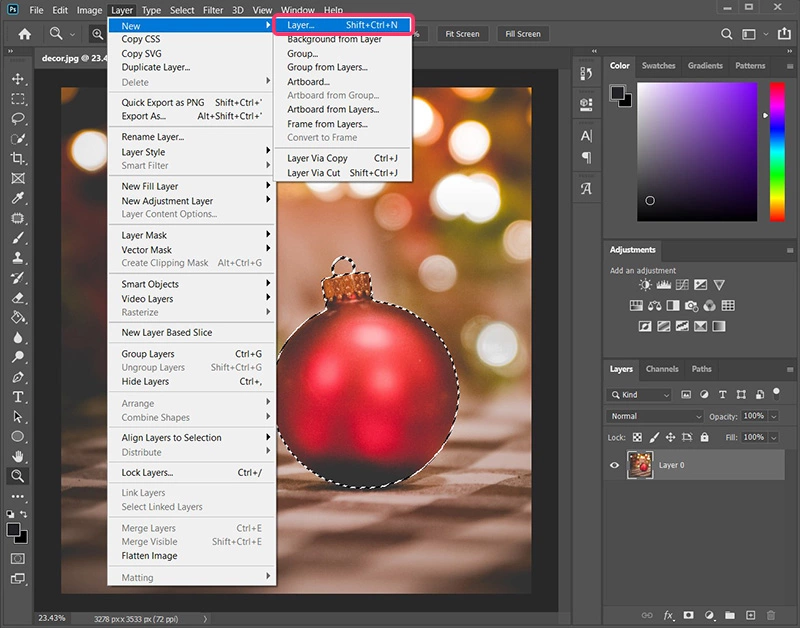
Let’s start with an image of the red ornament ball in front of a bright background. Our goal is to create a new layer that will contain only the decoration ball without the background.
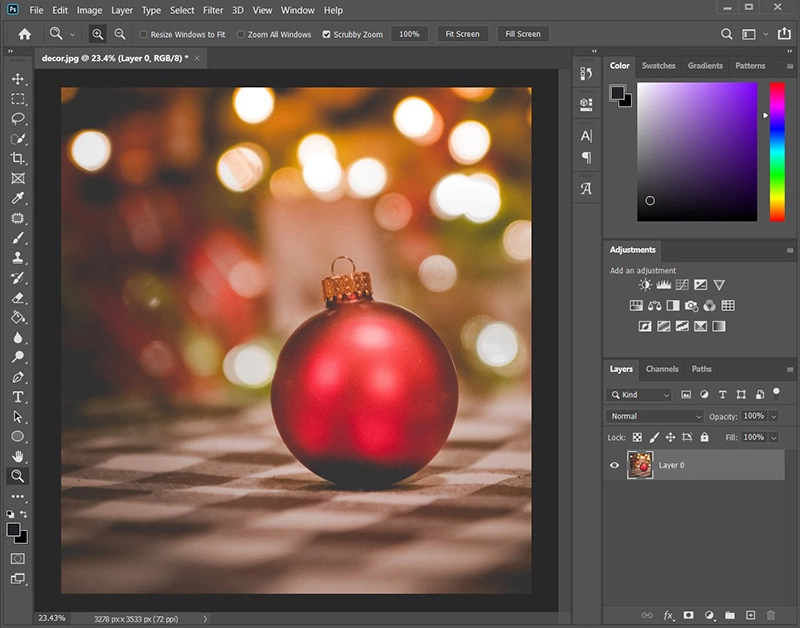
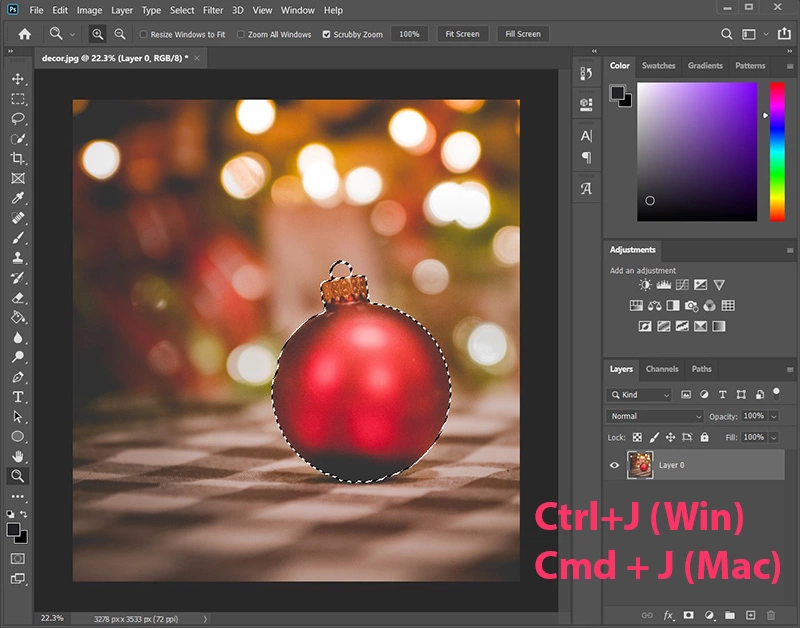
Step 1. Select the layer that contains the object you want to copy into a new layer. Use one of the selection tools to select the object.
Step 2. Press Ctrl+J (Windows) or Command+J (Mac) to copy the object you selected into a new layer. This method is also called Layer via Copy, and you can achieve the same result by choosing Layer > New > Layer via Copy from the Photoshop upper bar menu.
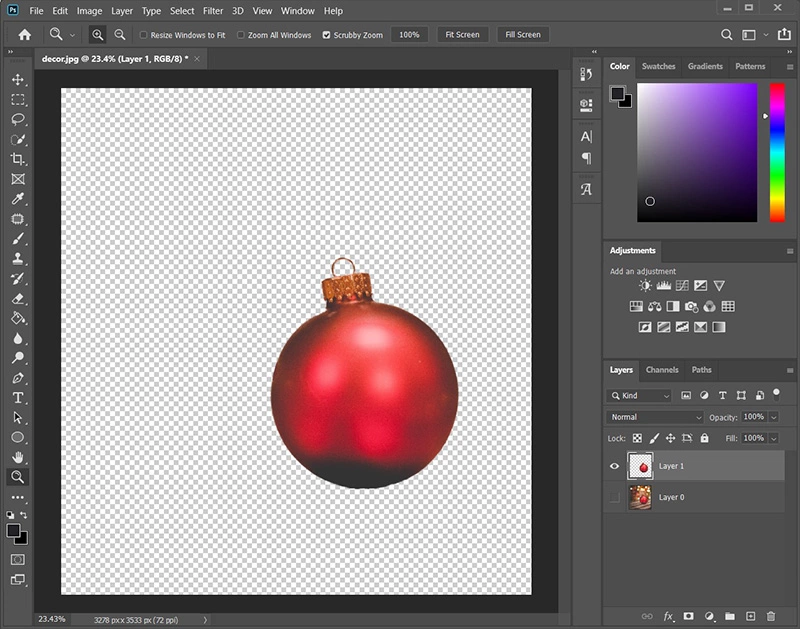
Step 3. A new layer is created, and it contains only the copied object from the original layer.
TIP - Instead of using the Layer via Copy method, you can use the Layer via Cut method. The main difference is that if you use the latter, the selected object will be cut out from the original layer.
Copy and paste the selection to a new layer
Another method you can use to achieve the same result is very similar to the first one but requires a few clicks more. It will be probably familiar to you because it includes standard shortcuts for copy and paste.
I’ll show the example on the same image as before.
Step 1. Make sure you selected an object you want to copy to another layer.
Step 2. Press Ctrl+C (Windows) or Command+C (Mac) to copy the selected object to the clipboard.

Step 3. Create a new layer by clicking on the icon in the lower right corner of the Layers panel. Alternatively, you can choose Layer > New > Layer from the upper bar menu to create a layer.
Step 4. Finally, press Ctrl+V (Windows) or Command+V (Mac) to paste the selected object into the new layer.
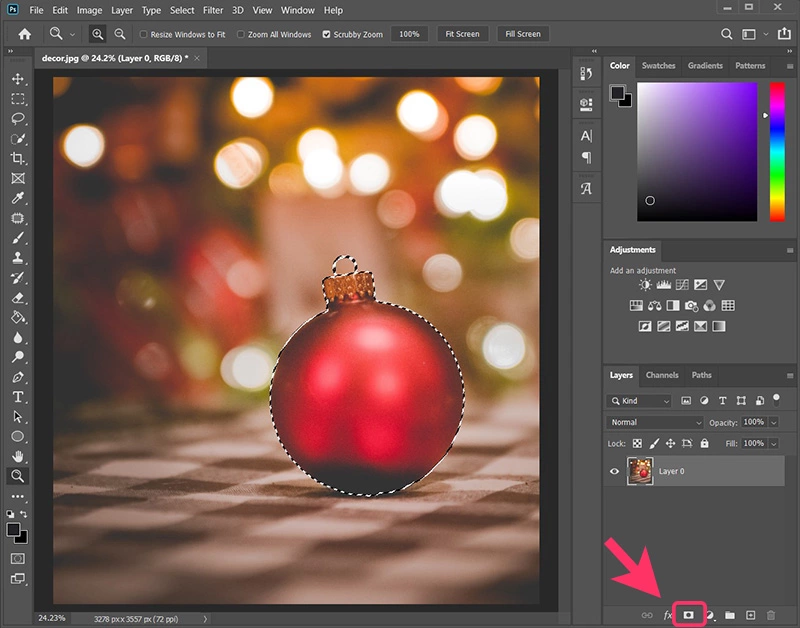
The selected object is part of a new layer now. In our example, the new layer contains only the red ornament ball without any background.

How to create a layer mask from the selection
Another good practice that may give you even more flexibility is to create a layer mask from selection. It enables you to later fine-tune the part you previously selected.
Step 1. Use any of the selection tools to select the desired object.
Step 2. When you are satisfied with the selection, click on the Add layer mask in the Layers panel to add the black and white overlay to the image.
Step 3. Layer mask thumbnail will appear next to the original layer’s thumbnail. You can fine-tune the selection by drawing directly on the layer mask.
NOTE - When working with layer masks, remember that white reveals and black conceals. If you want to hide a part of the layer, select black and draw over that part. If you want to make a part of the layer visible, make sure that part is white on the mask.
You can copy the layer and layer mask to another image, duplicate them, or apply filters to them. Just as you were working with a single layer, but still a little bit less destructive editing.
Move selection to a new layer
If you only want to move the selection bounds to another layer, all you have to do is click on another layer while the selection is active. The new layer will become active, but the selection will stay in place. It’s because selections behave differently than layers when it comes to moving and transforming.
TIP - To quickly select contents of a particular layer, hold down Ctrl (Windows) / Command (Mac) key and click on the layer thumbnail. Everything that is part of that layer will be selected.
Conclusion
Knowing how to create a layer from selection in Photoshop will surely help you in mastering Photoshop quicker. Don’t be afraid to experiment with selections, as they are often a major part of the editing process. Play with the different selection tools and learn which one is best to use for a particular situation.
See you next time!