
In this article, we will cover how to add bullet points to text in Photoshop. In case you are not familiar with what a bullet point is, it is most usually a black dot in front of an item in a list.
You may be surprised that Photoshop does not provide adding bullet points out-of-the-box. But Photoshop is a photo editor, not a text editor after all. Still, there may be a lot of situations in which you’ll have to combine text and images for the desired result.
There are multiple ways of how you can add bullet points to text, but I will show you these 3 best methods.
The 3 quickest ways to add a bullet point in Photoshop
The first few steps are the same in each method I’ll explain. They include opening a new document, choosing the Type tool, and creating a text box on the layer. I’ll write these steps here in detail so you can refer to them anytime.
Step 1. Open a file by choosing File > Open…, or create a brand new document by choosing File > New… > Create.
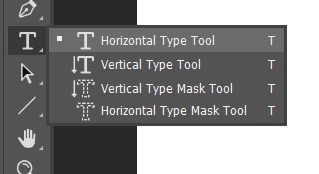
Step 2. From the sidebar menu, select Type Tool by clicking on the icon with the letter T. Specifically you should select the Horizontal Type tool, because usage of bullet points in most cases implies you’ll be writing text horizontally.
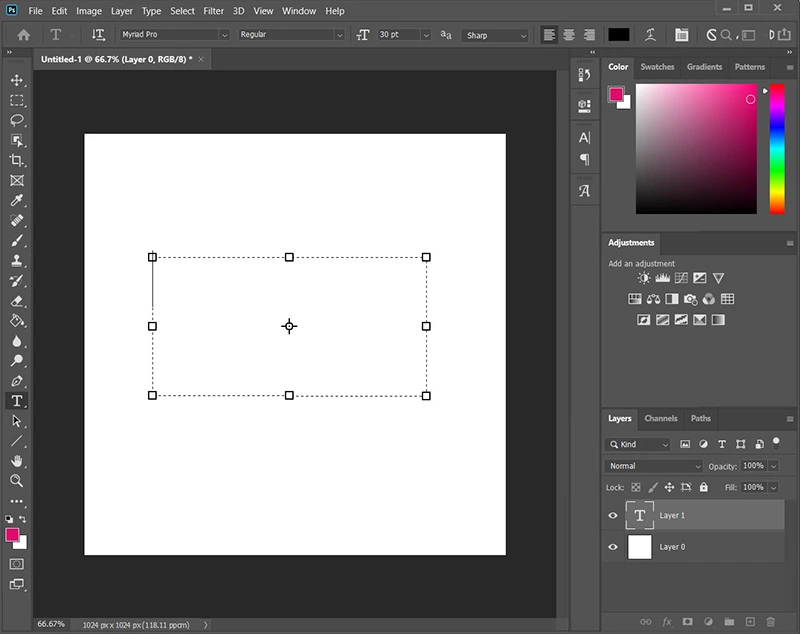
Step 3. Drag the text box where you want to put your bulleted list text. Dummy text will appear in the box, so just delete it and your text cursor should be blinking at the very start of the text box.
Now, to the point, how to add a bullet point in Photoshop?
Use a shortcut to add a bullet point
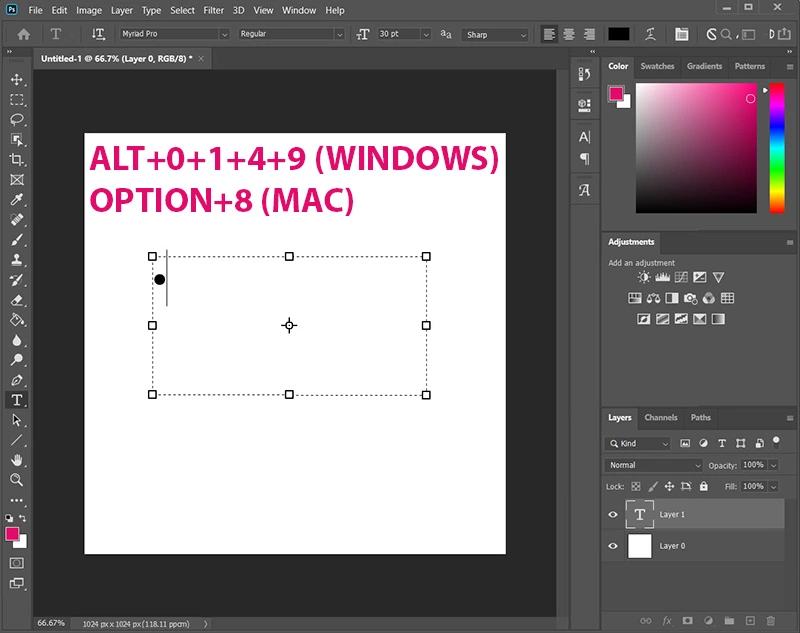
The quickest way to add a basic bullet point to text in Photoshop is to copy and paste one, or to use a predefined keyboard shortcut.
So, to add a basic bullet point:
- Copy and paste it from here: •
- On Windows, press Alt+0+1+4+9
- On Mac, press Option+8
Use Glyphs panel
Another quick method for adding a simple bullet point is to find and insert it using the Glyphs panel.
While being positioned at the beginning of the opened text box, open the Glyphs panel. To do that choose Type > Panels > Glyphs panel.
In the Glyphs panel, you can select what font you want to use. Each font has its symbols, so for example, if you choose Wingdings font you’ll have a wide range of black and white bullet point symbols to use.
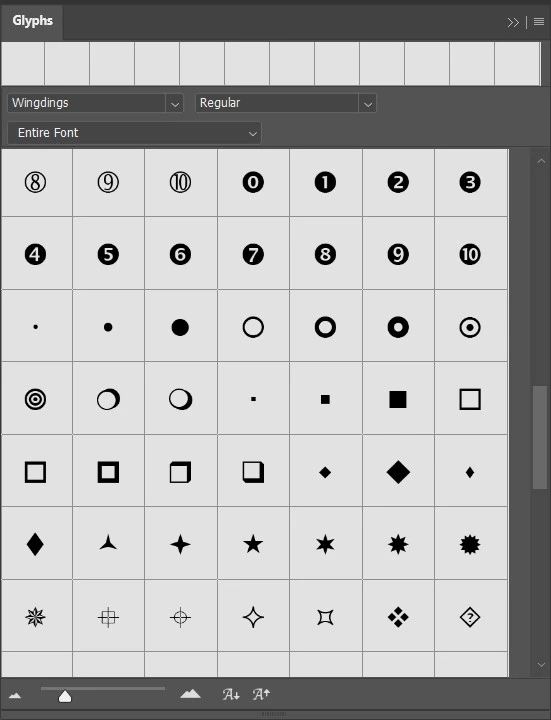
Still, if you want to use a more social-media-friendly type of bullet point, then select the EmojiOne font and pick the emoji you want.

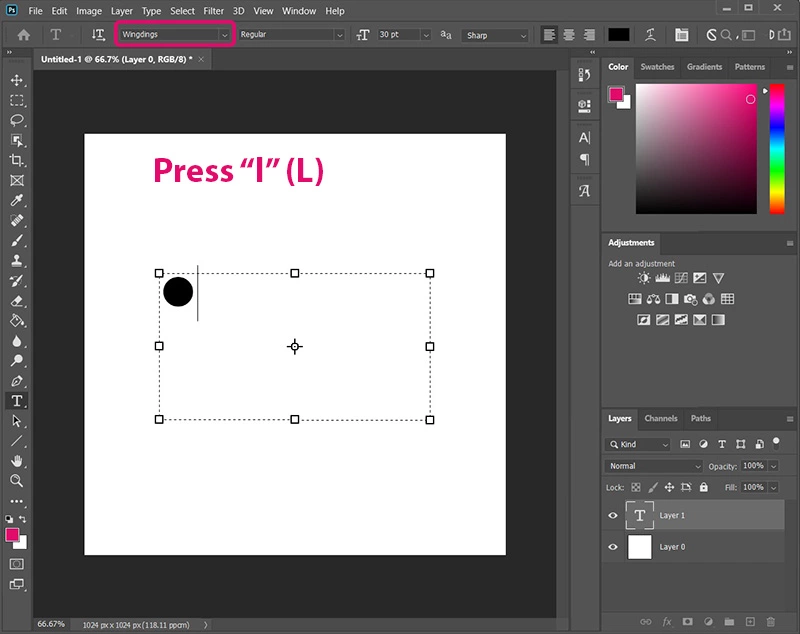
Use the Wingdings font
As I already mentioned in the previous section, there’s one font that has many more symbols than any other. It’s called Wingdings, and most commonly is used to quickly insert certain symbols into the text which are not usually available in most fonts. This makes it a perfect candidate for inserting bullet points in Photoshop!
To add a bullet point, make sure that you are positioned in an empty text box. Then, from the upper bar menu, select the Wingdings font. Type “l” (L) and – now you have a bullet point.
Align multiline text in a bulleted list
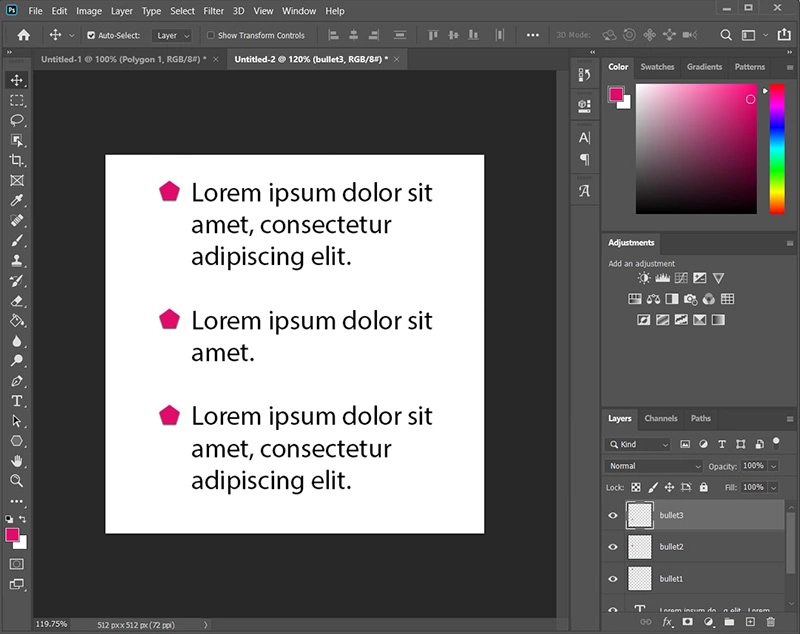
Everything works fine if you have short text after a bullet point. But what if your list contains multiline text for each list item? Then your bulleted list may finish unaligned at some parts which will look messy. Don’t worry, here’s a solution that will make your list pretty again.
The trick is in using two text boxes instead of just one. The first text box should contain only original text. The other text box should be a shifted copy of the first one, but with bullet points located at the same positions as each paragraph’s first line.
Let me show you how to do that.
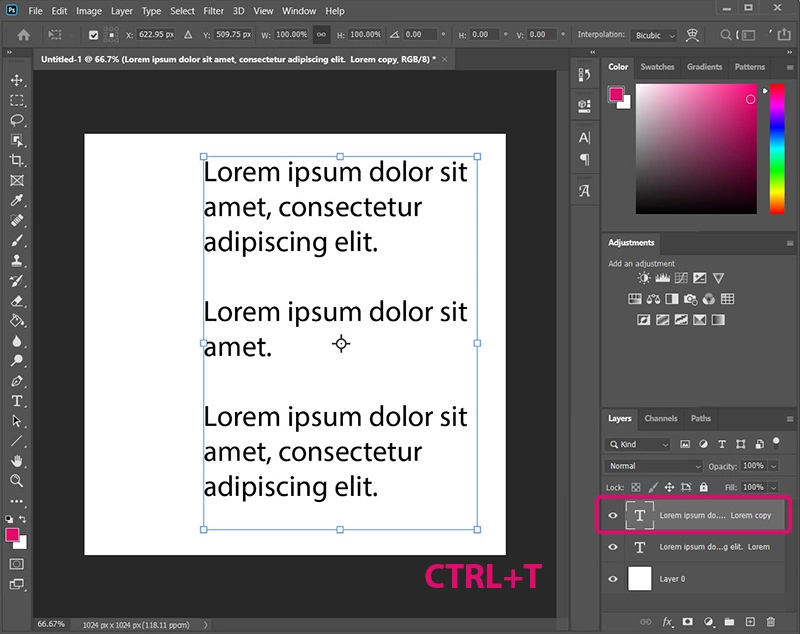
Step 1. Choose the Type tool by pressing T on the keyboard, then drag the text box somewhere on the canvas. Next, paste the text you want to show as a bulleted list inside the text box.
Step 2. Now duplicate that layer once. First select it, then press the CTRL+J (Windows) or Command+J (Mac).

Step 3. Make sure that the newly created layer copy is selected in the Layers panel, then press CTRL+T (Windows) or Command+T (Mac) to switch to Transform mode.
Step 4. While pressing SHIFT, start tapping the left arrow on the keyboard to slightly move the text box to the left.
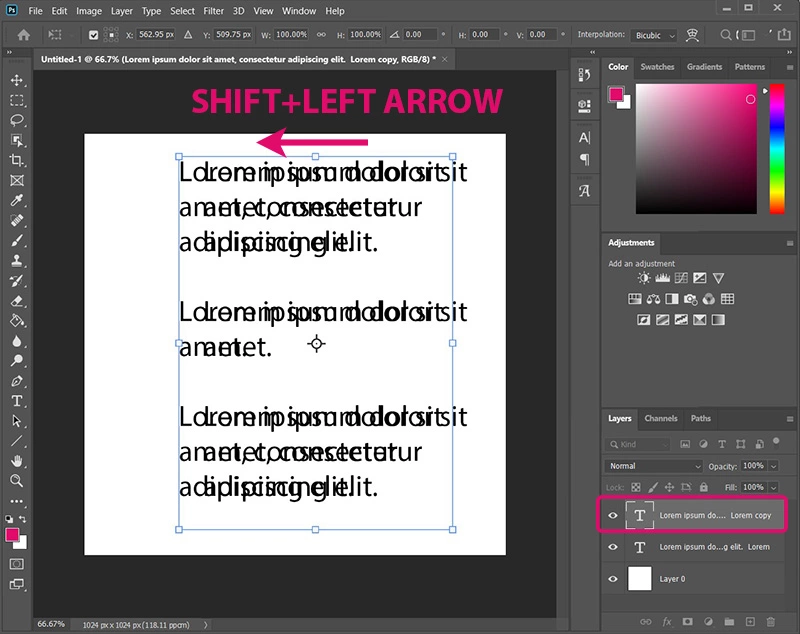
Step 5. When you are satisfied with the position of the text box, replace the content inside with the bullet points. Double-click the layer’s thumbnail and use any of the previously mentioned methods to add a bullet point. Your multiline text list should now look professional and pretty!

How to create your bullet point in Photoshop?
In some cases, you’ll need your customized bullet point. I’ll show you how to do it. In short, you’ll need to create a bullet point in a form of an image, then import it into a project where you want to use it.
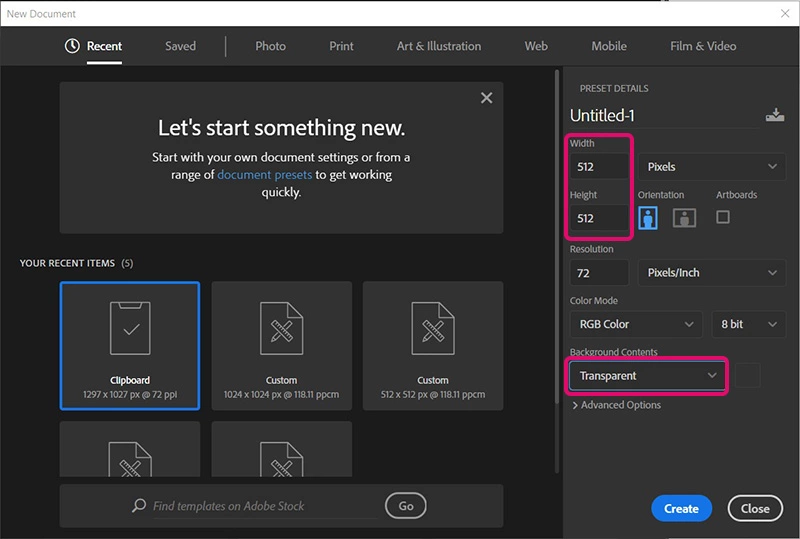
Step 1. Open a new document by going to File > New…
Step 2. Choose the same width and height values, for example, 512 x 512 pixels. Select “Transparent” from the Background Contents menu and press Create.
Step 3. At this step only your creativity is important. Draw any shape, line, or even import another PNG image as a new layer.
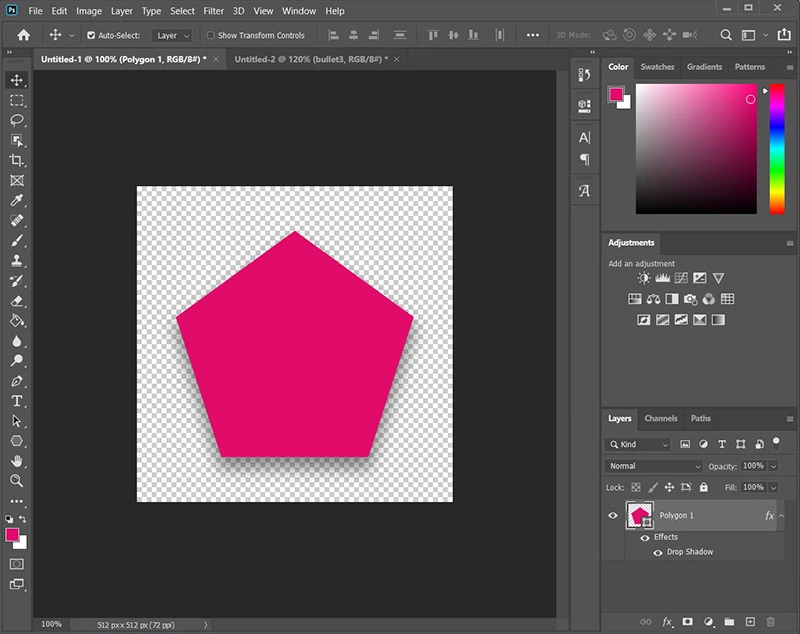
Step 4. You can also apply any styling or color to achieve the look you want for the bullet point.
Step 5. When you are done, save the image in PNG format by selecting File > Save As and then choose PNG format from the Save as type menu.
Step 6. To use the newly created bullet point, drag and drop it to the project you are working at.
Summary
We went through a few different methods of adding Photoshop bullet points to your artwork. It depends on the overall style of art which bullet points will you use.
If you are into the more basic look, then just use the keyboard shortcuts or copy-paste the bullet point symbol I put in the first section. On the other hand, you can also use some crazy font like EmojiOne if you are creating content for social media. But I also recommend experimenting with creating your bullet points. Remember, only the sky is the limit, be creative!
Thanks for your attention guys, see you next time!